Oct 11, 2011

Cisco's IOS 密碼加解密

前幾天跟為需要,剛在在研究 cisco ios 的密碼,它的主要加解密如下

利用一組 byte array 當做轉換碼

char xlat[] = {                                                                  
    0x64, 0x73, 0x66, 0x64, 0x3b, 0x6b, 0x66, 0x6f,                              
    0x41, 0x2c, 0x2e, 0x69, 0x79, 0x65, 0x77, 0x72,                              
    0x6b, 0x6c, 0x64, 0x4a, 0x4b, 0x44, 0x48, 0x53 , 0x55, 


加密方式:

1. 先選出一個 seed number,做為 xlat 的起始字元,但此數字需為 0x0 ~ 0xF
2. 密碼字串每一個字與 xlat[seed++] 字 XOR,之後把字元轉成字串


cencrypt(char *dec_pw, char *enc_pw)
{
    unsigned int seed = dec_pw[0] % 16;
    unsigned int p = 0;
    unsigned int i = 0;
    unsigned int val = 0;

    enc_pw[p++] = (seed >> 4 & 0xf) + '0';
    enc_pw[p++] = (seed & 0xf) + '0';

    for(i = 0; i < strlen(dec_pw); i++) {
        val = dec_pw[i] ^ xlat[seed++];

        enc_pw[p] = (val >> 4 & 0xf) + '0';
        if(enc_pw[p] > '9') {
            enc_pw[p] = enc_pw[p] - ':' + 'A';
        }
        p++;

        enc_pw[p] = (val & 0xf) + '0';
        if(enc_pw[p] > '9') {
            enc_pw[p] = enc_pw[p] - ':' + 'A';
        }
        p++;
    }
    printf("%s\n", enc_pw);

    return 0;
}

範例:

$ ./cisco_encrypt -e Cisco
032752180500

第一組 03 為 seed number,此 number 為 'C' % 16 得到
第二組 27 為 'C' ^ xlat[0x3] 得到
第三組 52 為 'i' ^ xlat[0x4] 得到,之後以此類推

Conclution

雖然 cisco 的 password type 7 可被很容易的反解出來,而且早在 1997 就已被公開反解方式,但到目前 2011 年已過了十四年,cisco還是沒打算更改加密的方式,我想這有幾個可能的原因,首先,在古早的網路設備裡,大多數的 control plane 上的 CPU 都很慢,重點主要是 data plane 上的 FPGA or ASIC,為了減少 control plane 的負擔,用最簡單的方式,當然,我想,這因該不是主要的原因。另外,從目前手上的機器(Cisco Aironet 1260)來看,它的 Default Config,登入用的 username, password 與 enable password 都是大家所知道的 "Cisco",而它的 enable password 使用 MD5 而不是 reversible 的方式。


enable secret 5 $1$50r.$jwGnU838Lega3wGEBCpZ30
!
username Cisco password 7 032752180500

另外,如你要拿到 running-config 一定要先進入 enable mode,所以原則上你是拿不到此機器的 config file,另外,除非對方剛好也有開 SNMP 而且你也剛好知道它的 community string,又剛好此 community 被設成有 read-write permission,那當然就有辨法拿到 config file,不過這時已不是 username password 的問題了,對方大可直接使用 SNMP 來對你的機器惡搞。

最後,從目前我所知道的知識裡,看來,cisco 對於 username 可使用 type 7 來加密對於安全上不太會有多大的問題,當然你也可使用 type 5 的方式。


Links

Feb 2, 2011

IPv6 Ready Logo 筆記

1/31, 2/1 算是正式在目前公司工作的最後二天,之前一直沒有機會,或許因該說,一直偷懶(哈哈..)沒試著測看看 Ready Logo Testing 在自家的機器上,利用最後的時間,測了一下,雖然沒能完全跑完所有的 auto test ,主要是太多東西要慢慢 tune 了,比如字串比對之類的,比較好奇,測試者需要自行更改 v6eval的perl module?? 本身不懂 perl 所以還花了一點時間試著去了解一些語法 XD,以下是這二天來的筆記。

Software : 
FreeBSD 7.3-RELEASE FreeBSD 7.3-RELEASE
v6eval-3.3.1 : IPv6 Conformance Test Package
Self_Test_5-0-0 : Self-Test Tools for IPv6 Ready Logo Program

v6eval 安裝與設定 : 

新版的 v6eval-3.3.1 已把 v6eval-remotes 整合進來,安裝 v6eval 前需要先安裝 perl5 相關 module
  • Expect : /usr/ports/lang/p5-Expect
  • IO-Tty : /usr/ports/devel/p5-IO-Tty
  • Digest-MD5 : /usr/ports/security/p5-Digest-MD5
  • YAML : /usr/ports/textproc/p5-YAML
1. 安裝:
make
sudo make install

2. 環境相關設定:
Configure and test serial line:
sudo touch /var/log/aculog
sudo chown uucp:dialer /var/log/aculog
sudo chmod 660 /var/log/aculog
sudo cu -l /dev/cuad0 # test connection. type "~." to exit
Interface configuration:
# sudo vim /etc/rc.conf
  ipv6_enable="NO"
  ifconfig_em1="up"

Self_Test_5-0-0 安裝與設定 : 
Terminology:
Tester Node (TN) : A tester node for the conformance tests.
Node Under Test (NUT) : A testee node for the conformance tests.
Network Under Test : The network where the conformance tests are executed.
Tester Interface : The network interface of TN hooked up to the Network Under Test.
Interface Under Test : The network interface of NUT hooked up to the Network Under Test.
1. 安裝:
只需解壓縮就好

2. 測試之前的準備:
  • 開始測試之前,需要依照你的測試架構做 tn and unt 的 defined,define 檔於 /usr/local/v6eval/etc/
  • 不確定是否是因為不了解它的測試架構,如要自動測試,使用者需自行修改測試 perl module /usr/local/lib/perl5/site_perl/5.10.1/V6evalRemote.pm 才能正常使用,或許因該有更好的方法才對 ??
  • 測試設定檔裡面的字串,"空白、跟Tab",Script 對字串的除理沒有做的很好
  • 自動測試的 rmt 檔需要放在 /usr/local/v6eval/bin/{Type}/ 下
  • 利用rmt檔來測試是否能成功自動登入與登出
    sudo /usr/local/v6eval/bin/{product name}/loginout.rmt -o1
    sudo /usr/local/v6eval/bin/{product name}/reboot.rmt -o1

3. 實際測試環境:

1) NUT is a host or special
TN                               NUT
 | Tester I/f: em0         | I/f Under Test: 0/41
 |                                       |
-+-----------------------+- Link0
     Network Under Test

4. 開始測試:
sudo make ipv6ready_p1_host; (Phase I)
sudo make ipv6ready_p2_host; (Phase II)

相關設定檔

$ cat /etc/rc.conf
# -- sysinstall generated deltas -- # Fri Jan 14 08:47:38 2011                                    
# Created: Fri Jan 14 08:47:38 2011                                                                
# Enable network daemons for user convenience.                                                    
# Please make all changes to this file, not to /etc/defaults/rc.conf.                              
# This file now contains just the overrides from /etc/defaults/rc.conf.                            
inetd_enable="YES"                                                                                
linux_enable="YES"                                                                                
sshd_enable="YES"                                                                                  
ipv6_enable="NO"                                                                                  
ifconfig_em1="up"                                                                                  
ifconfig_em2="up"
$ cat /usr/local/v6eval/etc/tn.def
#
# tn.def
#
#  Information about the Tester Node (TN)
#

#
# Remote Controal Configuration
#
RemoteDevice    cuad0
RemoteDebug     0
RemoteIntDebug  0
RemoteLog       1
RemoteSpeed     0
RemoteLogout    0
RemoteMethod    serial
#filter ipv6

#linkname       interface       BOGUS ether source address
#               name            of the Tester Interface
Link0           em1             00:00:00:00:01:00
#Link1          de1             00:00:00:00:01:01
$ cat /usr/local/v6eval/etc/nut.def
#
# nut.def
#
#  Information about the Node Under Test (NUT)
#

# System type
System          {Product Name}

# System information
TargetName      FreeBSD/i386 4.9-RELEASE + kame-20040726-freebsd49-snap

# Name
HostName        {another name}

# Type
#   host, router, special
Type            host

# Super user name and it's password
# if you select manual as "System", you don't care "User" and "Password"
#
User            admin
Password        admin

#linkname       interface       The EXACT ether source address
#               name            of the Interface Under Test
Link0           0/41            00:C0:9F:00:28:93

/usr/local/lib/perl5/site_perl/5.10.1/V6evalRemote.pm 改過的地方
$debug=1;
$Type="{System Type}";
$Device="cuad0";
$User="admin";
$Password="admin";

# login prompt
'{System Type}',     'User:',
# password prompt
'{System Type}',     'Password:',
# command prompt
'{System Type}',     '#',
# command of the admin mode if any
'{System Type}',     'enable',
# logout command
'{System Type}',     'exit',
# reboot command
'{System Type}',     'r',
# final confirmation for reboot if any
'{System Type}',     'would like to reset the system',
# reply of the final confirmation for reboot
'{System Type}',     'y',
# pre-final confirmation for reboot if any
'{System Type}',     'Would you like to save them now',
# reply of the pre-final confirmation for reboot
'{System Type}',     'n',

Dec 11, 2010

git object

git 裡,所有的檔案、文件與資料匝都是以 hash 來表示"身份" (object),而 hash 是使用 SAH1,這樣每一個 object 幾呼是唯一性的。git 中所謂的 object 指的是,content 本身加上 hash,而 content 分為下面四種 blob, tree, commit, and tag.
blob : the data is the contents of a file
tree : To store a directory, Git writes out an object describing the directory's contents

實際測試看看 :
$ echo "hello" > hello
$ git add .
$ git commit -am 'hello'
[master (root-commit) 21039e0] hello
 1 files changed, 1 insertions(+), 0 deletions(-)
 create mode 100644 hello

$ mkdir foo
$ echo "bar" > foo/bar
$ echo "world" >> hello
$ git add .
$ git commit -am 'foo/bar and hello world'
[master ab4c151] foo/bar and hello world
2 files changed, 2 insertions(+), 0 deletions(-)
create mode 100644 foo/bar

$ git log
commit ab4c151820a51da73eb00381472a4774475bcf66
Author: Yao-Po Wang
Date: Sat Dec 11 16:07:27 2010 +0800

foo/bar and hello world

commit 21039e0f12ebf539275346566982566c3bcd9217
Author: Yao-Po Wang
Date: Sat Dec 11 16:06:32 2010 +0800

hello

利用 git cat-file 來得到更多資訊
git-cat-file - Provide content or type and size information for repository objects
Option:
-t : show the object type.
-s : show the object size.
-p : Pretty-print based on its type.


$ git cat-file -t 21039
commit

$ git cat-file -s ab4c1
234

$ git cat-file -s 21039
168

可利用 -p or commit 來提到,此 commit 的 tree object
$ git cat-file commit 21039
$ git cat-file -p 21039
tree b4d01e9b0c4a9356736dfddf8830ba9a54f5271c
author Yao-Po Wang 1292054792 +0800
committer Yao-Po Wang 1292054792 +0800

hello

從上面,我們可以得到 commit 的 tree object 利用 tree object 可得知,在這個 commit 的情況下目錄包含的
git ls-tree - List the contents of a tree object
$ git ls-tree 21039e0
100644 blob ce013625030ba8dba906f756967f9e9ca394464a hello

$ git ls-tree ab4c151
040000 tree ee314a31b622b027c10981acaed7903a3607dbd4 foo
100644 blob 94954abda49de8615a048f8d2e64b5de848e27a1 hello

$ git ls-tree -r ab4c151 <-- recurse 100644 blob 5716ca5987cbf97d6bb54920bea6adde242d87e6 foo/bar 100644 blob 94954abda49de8615a048f8d2e64b5de848e27a1 hello


從 git ls-tree 我們可以知道,tree 下所有的 blob (補 SHA-1 的 content), 利用 cat-file blob 就可得知在些 commit 下的 blob 的內容
$ git cat-file -p ce0136
hello

$ git cat-file blob 94954
hello
world

到這裡,因該可以大約的知道, 放在 git 裡的檔案是如果被儲存與 object 的架構, 而這些 object 是被存放在 .git/objects 下
$ tree .git/objects/
.git/objects/
├── 21
│   └── 039e0f12ebf539275346566982566c3bcd9217
├── 55
│   └── 9dbaeba4c3e2fff4ac4bf4323b13a5ed1616c7
├── 57
│   └── 16ca5987cbf97d6bb54920bea6adde242d87e6
├── 94
│   └── 954abda49de8615a048f8d2e64b5de848e27a1
├── ab
│   └── 4c151820a51da73eb00381472a4774475bcf66
├── b4
│   └── d01e9b0c4a9356736dfddf8830ba9a54f5271c
├── ce
│   └── 013625030ba8dba906f756967f9e9ca394464a
├── ee
│   └── 314a31b622b027c10981acaed7903a3607dbd4
├── info
└── pack

10 directories, 8 files

Nov 24, 2010

Python Cheat Sheet

剛剛逛 Tsung's Blog 看到一篇分享 Python Cheat Sheet 的文章就想起,以前也曾經找過相關的東西,個人記性不是那麼好,只要過一陣子沒寫 Code 語法很快就會忘記,所以看 Cheat Sheet or Quick Reference 是最好的 recall 方式。

Quick Python Script Expalanation for Programmers from http://coffeeghost.net


中文版 from http://wiki.woodpecker.org.cn/

Python 2.6 Quick Reference

Nov 20, 2010

Kernel Shared Memory (KSM)

Kernel Shared Memory[1] 有時也被稱為 Kernel Samepage Merging 是在 linux 2.6.32[2] 被加入 main tree 裡,簡單的話,它的目地如 XEN的 Memory CoW[3] 與 VmWare 的 Transparent Page Sharing[4] 一樣,把相同內容的 page merge 在一起就是做 de-duplication 的動作讓記憶體空間更有效的被利用,當然相對地,需要花更多的 CPU 效能來做這些事,不過相對上來說,因該還是值得的。

動手玩看看前,先確定 linux kernel > 2.6.32 and Enable KSM
$ cat /boot/config-`uname -r` | grep KSM
CONFIG_KSM=y

KSM 只能使用在利用 madvise syscall 將記憶體區塊設為 MADV_MERGEABLE,另外如要取消改為 MADV_UNMERGEABLE。所以需要確認 KVM 的版本 > v0.12.0-rc0。

linux 有 Enable KSM 的話,/sys/kernel/mm/ksm/ 會有以下檔案
pages_shared how many shared pages are being used
pages_sharing how many more sites are sharing them i.e. how much saved
pages_unshared how many pages unique but repeatedly checked for merging
pages_volatile how many pages changing too fast to be placed in a tree
full_scans how many times all mergeable areas have been scanned
run Whether the KSM process is running.
sleep_millisecs how many milliseconds ksmd should sleep before performing another page scan.

開始使用
1. 開啟 KSM 功能
echo 1 > /sys/kernel/mm/ksm/run

2. 開二個相似的 VM image
/opt/bin/qemu -hda xp.raw -m 1024 &
/opt/bin/qemu -hda xp2.raw -m 1024 &

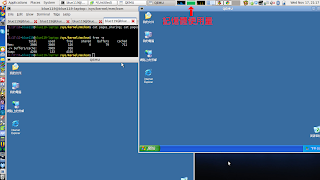
下面的二張圖是有開KSM跟沒關的差別,可明顯的看出,開了KSM的記憶體使用量少了一半左右


[1] http://lwn.net/Articles/306704/
[2] http://kernelnewbies.org/Linux_2_6_32
[3] http://www.xen.org/files/xensummit_fall07/18_GregorMilos.pdf
[4] http://kb.vmware.com/kb/1021095

Nov 11, 2010

讓你的封包,送出時自動加上 VLAN ID

在 Linux 下,使用 VLAN 的方法

1. insert 802.1q kernel module
sudo modprobe 8021q 


2. create a vlan id on NIC by vconfig

sudo vconfig add eth0 111
Added VLAN with VID == 111 to IF -:eth0:-
3. start up eth0.111
sudo ifconfig eth0.111 192.168.1.2 up

4. 測試前的準備:
sudo ifconfig eth0.111 192.168.1.2

eth0.111  Link encap:Ethernet  HWaddr 00:21:70:ff:d7:88  
          inet addr:192.168.1.2  Bcast:192.168.1.255  Mask:255.255.255.0
          inet6 addr: fe80::221:70ff:feff:d788/64 Scope:Link
          UP BROADCAST RUNNING MULTICAST  MTU:1500  Metric:1
          RX packets:0 errors:0 dropped:0 overruns:0 frame:0
          TX packets:3 errors:0 dropped:0 overruns:0 carrier:0
          collisions:0 txqueuelen:0 
          RX bytes:0 (0.0 B)  TX bytes:238 (238.0 B)
5. 利用 wireshark 抓出來的封包


此例中,在eth0上加上 vlanid 111,成功之後,會多出一個 eth0.111 的network device,只要是從這個 device 出去的封包,會自動加上 802.1Q 的 header

Oct 24, 2010

zenity 的 python wrap : PyZenity

Zenity 的相關範例可以參考 A COMPLETE ZENITY DIALOG EXAMPLES 2
PyZenity 其實一個 wrap 而已,執行時是 call popen(zenity),而使用起來跟 zenity 差不多。